
September Stamper's Group

  • This is the first project I did with my Stamper's Group. Very cute as a gift, make a theme for someone so that they always have cards on hand.


    Card Gift Bag
    Adapted from Paper Crafts Magazine


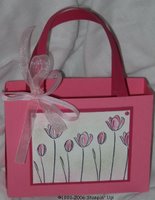
    Great for giving sets of matching cards or stationery or small gifts
  • Use one full sheet of 8 ½ x 11 cardstock
  • Score at 7 ¼ (+/or at 1 ¼ depending on how you look at it) on the 11 inch sides
  • Score at 4 ½ (+/or at 6 ½ depending on how you look at it) on the 8 ½ inch sides
  • Fold the scored lines; cut the 4 1/2 inch score lines just to where they meet the 7 1/4 score lines (makes small flaps that will be folded in when you make the sides by adhering the longer flaps to each other).

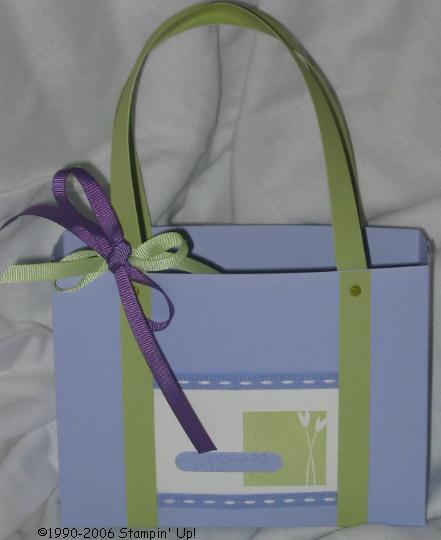
  • Finished size: 6 wide x 4 ½ tall x 2 deep
  • You can adjust the height and the depth of the tote be changing the 4 ½ inch score lines. That measurement determines the height of the sides – the depth of the purse will be affected.-adjust size by using 12x12 cardstock (or any size)
  • Embellish as you wish – the possibilities are endless- handles, straps, tags, hardware, stickers, photos, etc.

I would love to see how yours turned out, Please feel free to send me a photo or try to upload in the comments section.

Comments

Popular posts from this blog

Blog Candy Giveaway

Ok, I am so thrilled to be a Grandma! Addison (see previous post) is so adorable and gives me much "Love and Happiness" that I have to share some "LOVE and HAPPINESS" with you. Here's how it will work: Leave a comment with this posting about anything, especially "baby" or "baby & stamping" related. Leave me a link as well if you have some online samples. We will leave this for one week, and on Friday Feb 29 (leap year too ;) I will make a random drawing and announce the winner. What will you win? You will receive from me, the "Love and Happiness" rubons shown with this posting. These are great for both Stamping and Scrapbooking as they are acid free and scrapbook safe. The package includes 4 sheets, Black, White, Old Olive and Chocolate Chip...in the images shown. You can use Rub ons on paper and most nonporous surfaces including glass, photos, clipboards, candles and more. (check the photo here for a sample) The only limit wil

Decor Element Sample

Just thought I would share with you where I put my first Decor Elements. I wanted to put this in my stamping room but really, if you have seen my room, there is no place on the walls to put it. I figured above the door is a good spot, perfect size and I look straight at it when I am busy "creating" My boys decided I needed a letter "C" to put in front so I have ordered and received it, just haven't put it up yet. If you come by my stamp room, be sure to have a peek at it for real. Oh, and these are super easy to apply. I did have some difficulty with the "dots" however, I have since received some tips and if you plan to get these, I will share them with you. :) Stampin' Up! has also created both an instruction sheet and a video for applying these.

Birthdays

Today is our Japanese student's birthday. We had a great celebration with her and a guest, including some major "baby" time where everyone got to hold Addison. She loved her gifts and was especially thankful for a home-made card. I can't say this is my own design as I copied it from a sample received in a swap when this set was in the mini catalog. But I have added a few of my own touches. Enjoy!